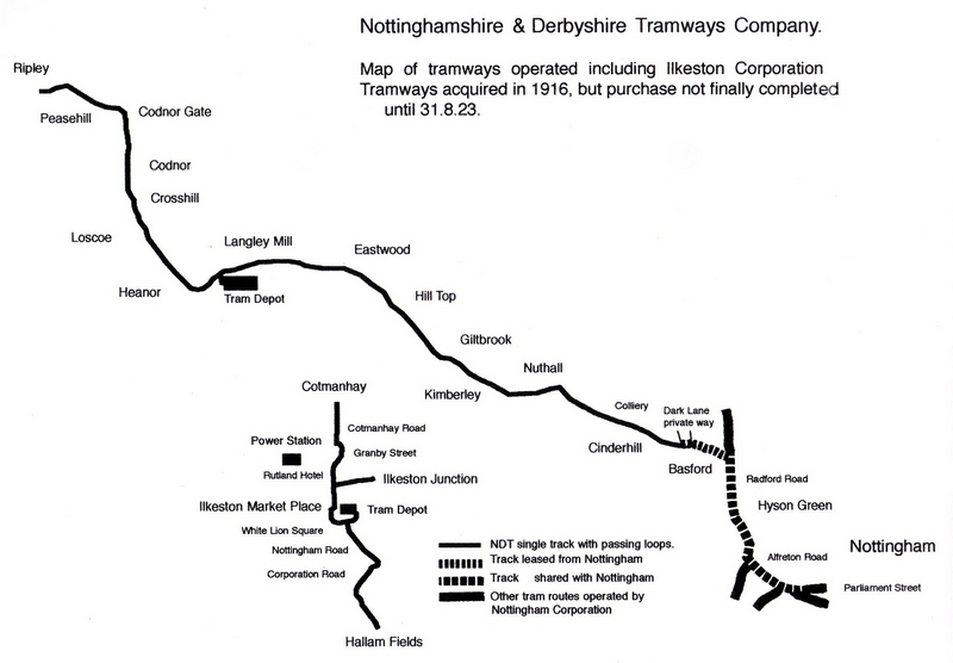
The Ripley to Nottingham Tramway 1913 - 1932
Known as 'Ripley Rattlers', it was by reputation that they were the most dangerous tramcar service in the British Isles, due to the length of the route and the steep rise and fall of the countryside that had to be negotiated.
The line ran from Co-operative Square in Ripley to Codnor, Loscoe, Heanor, Langley Mill (the depot), Eastwood, Kimberley, Cinderhill, then to Basford and on to the terminus on Upper Parliament Street in Nottingham.
The line ran from Co-operative Square in Ripley to Codnor, Loscoe, Heanor, Langley Mill (the depot), Eastwood, Kimberley, Cinderhill, then to Basford and on to the terminus on Upper Parliament Street in Nottingham.
Nottinghamshire & Derbyshire Tramways Company
The Nottinghamshire & Derbyshire Tramways Company was formed in 1903 by Act of Parliament. It was not until 1913 that the tramway from Ripley to Nottingham, via Langley Mill, Eastwood and Kimberley, was finally opened, the capital being funded by Balfour, Beatty & Co., of Ilkeston.
The laying of the tramlines was a major project - many of the bridges which can been seen along the route date from this time (for example, the bridge over the canal at Langley Mill, which had previously been a wooden construction), and many old buildings were demolished for road-widening (e.g. the Crown and White Hart pubs at Heanor). Initially, the trams only ran as far as Cinderhill / Basford, where people had to switch to trams of the Nottingham Corporation, but later the city allowed Notts & Derby trams to pass over its rails. The long route from Ripley was a single track, with 316 passing places along the route to allow trams to pass in the opposite direction.
A fleet of 24 new cars, half open top, half closed top, was used but during the life of this route, no others were added. As other forms of transport developed, this limitation to the trams caused their demise and by the end of 1932, with only maintenance vehicles in evidence, the system had all but been abandoned and the trolleybuses took over. The final tram ran on the 5th October 1932 to test the overhead wiring for the new trolleybuses.
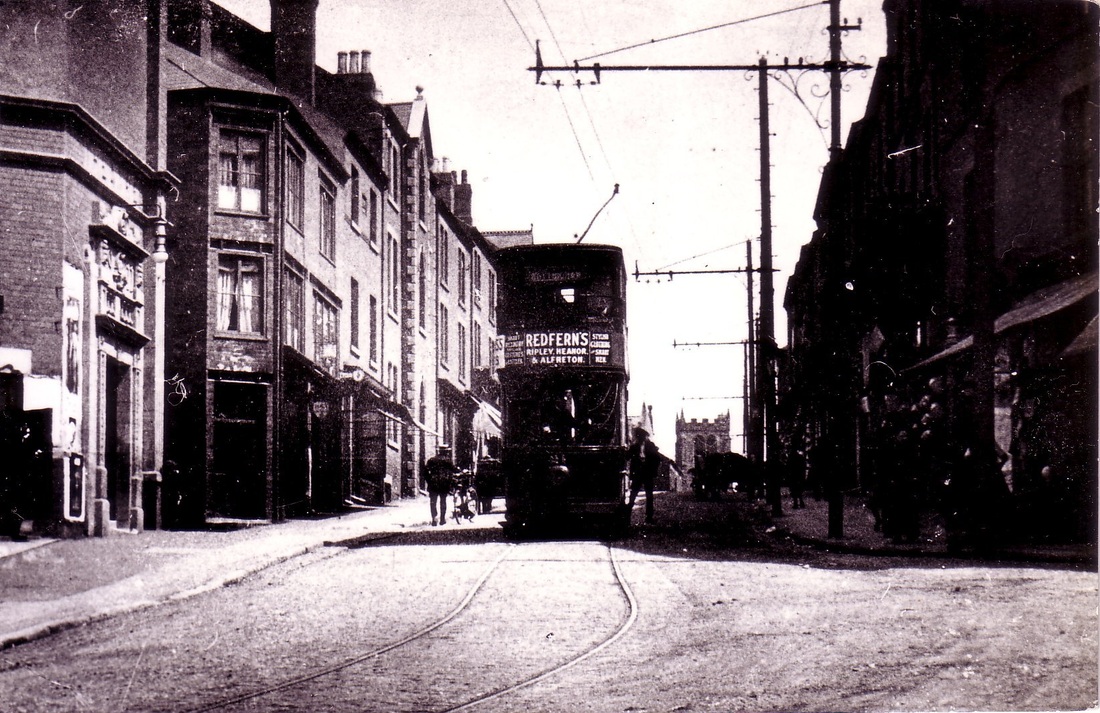
Ripley
Travelling on an open top tram in Ripley must have been a miserable affair. Despite being on the edge of the rolling green fields and hills of the Peak District, in those days Ripley was a grim place to live. The temperature on Ripley Market Place has always been well known for being several degrees colder than the surrounding area. The sky would be black with the pollution of the surrounding coal pits and the furnaces of the Butterley Company’s brick and iron works. It was said that it was common to never see the sun for days on end, even in the height of summer.
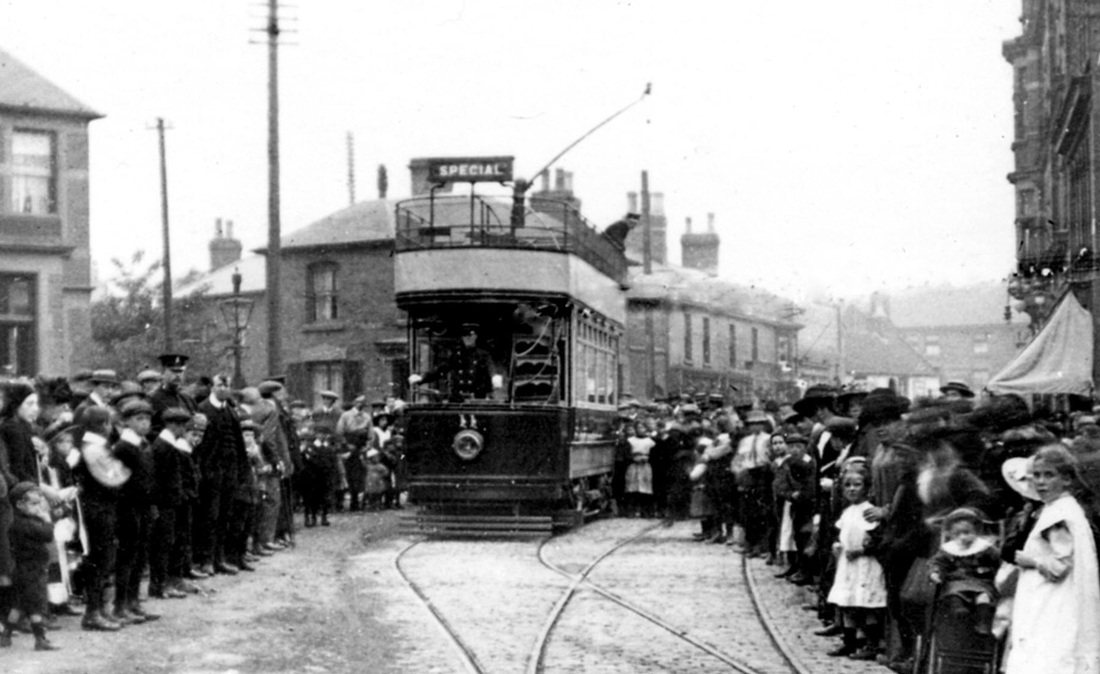
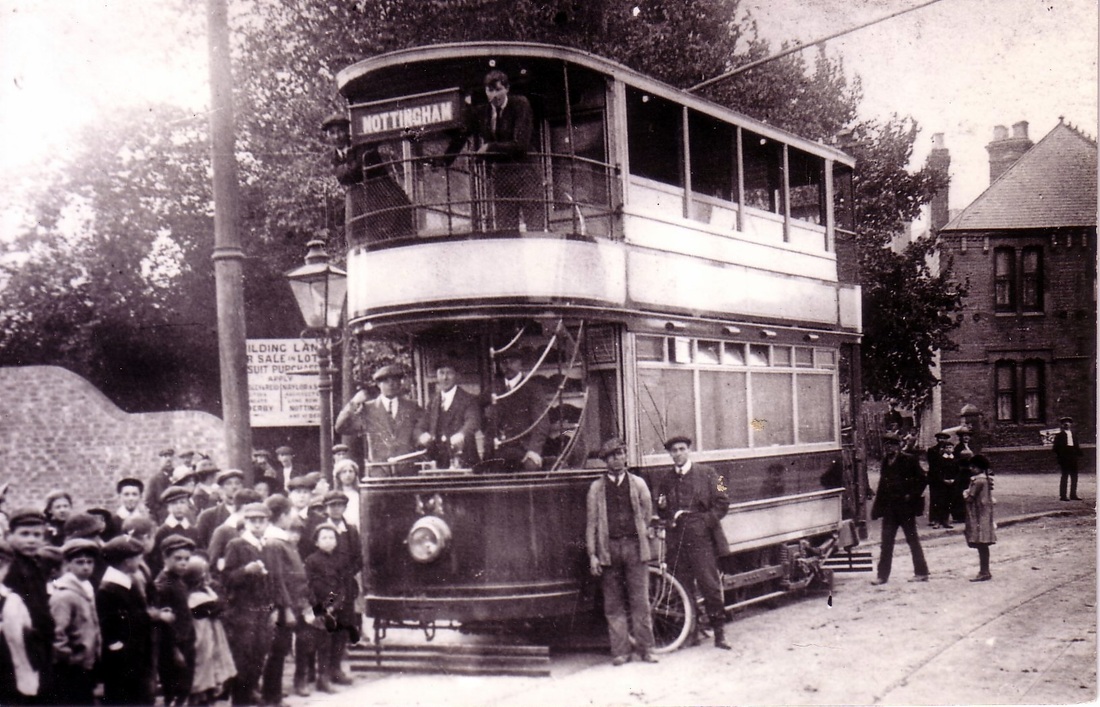
15th August 1913, one of the first two trams to arrive at Ripley. Notts & Derby open top tramcar No. 11 is pictured on the terminal loop at Co-operative Square, Ripley. The livery is light green and cream with gold lining. The destination blind reads: Special. The Ripley Co-operative Society building is situated on the right.
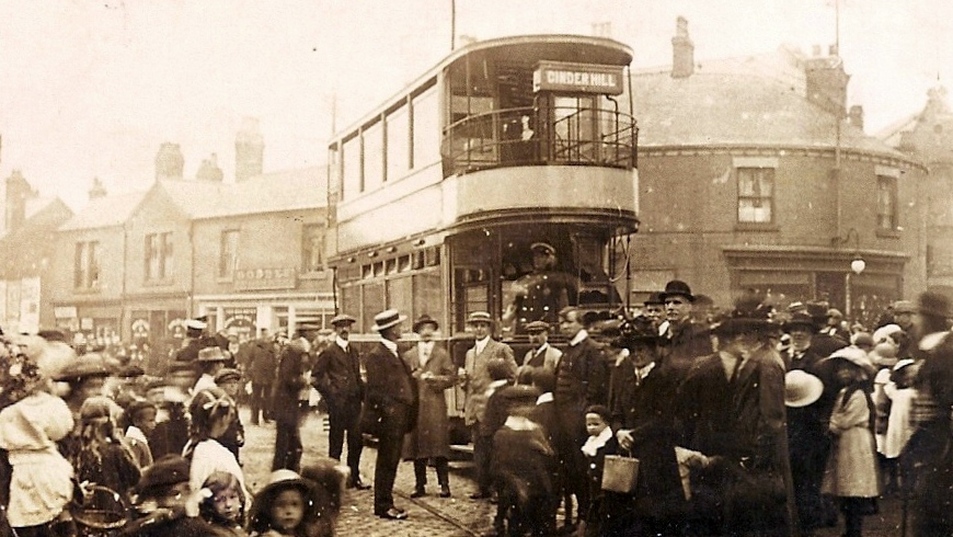
15th August 1913, one of the first two trams to arrive at Ripley. Seen from the opposite side of the road, Notts & Derby covered top tramcar No. 22 is pictured at the Co-operative Square Terminus. The livery is light green and cream with gold lining. Destination shown is: Cinderhill. By that date Cinderhill was the limit of the line into Nottingham. The welcoming comittee included Deputy Manager Stanley Dudman - the man sporting the boater (centre left) - plus the chairman of Ripley Council and the manager of the Co-op.
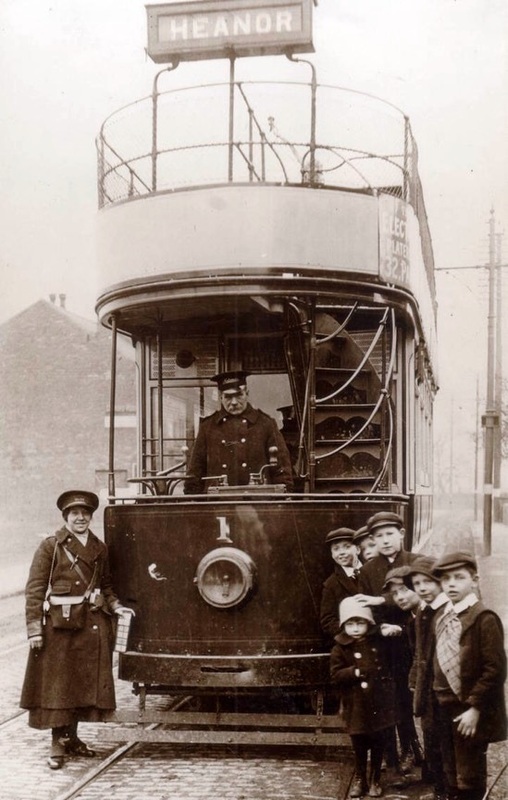
Notts & Derby open top tramcar no. 1 pictured during the Great War at Ripley waiting to begin a short-working to Heanor.
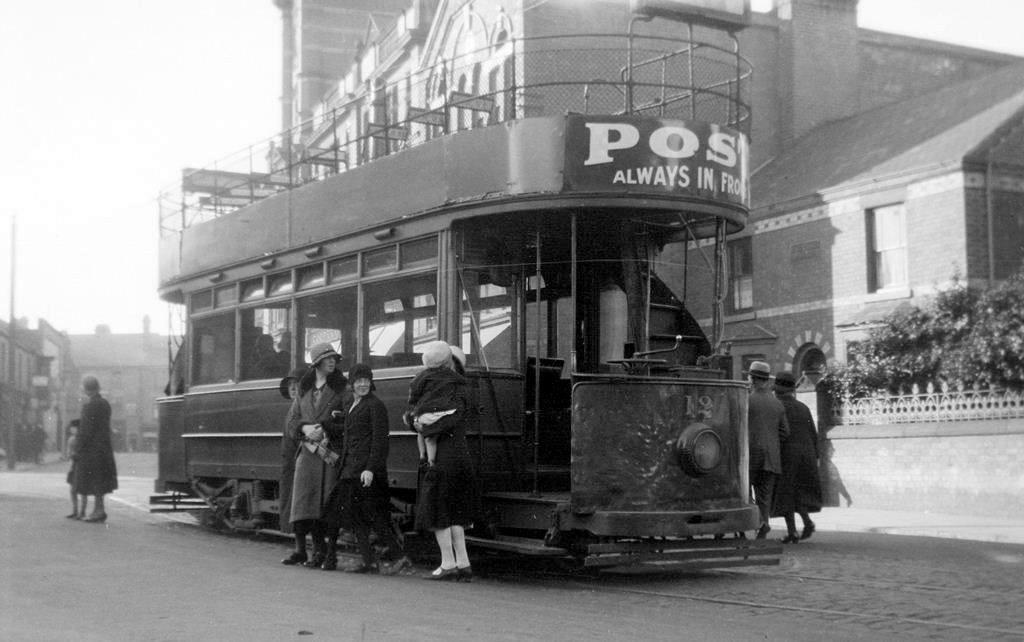
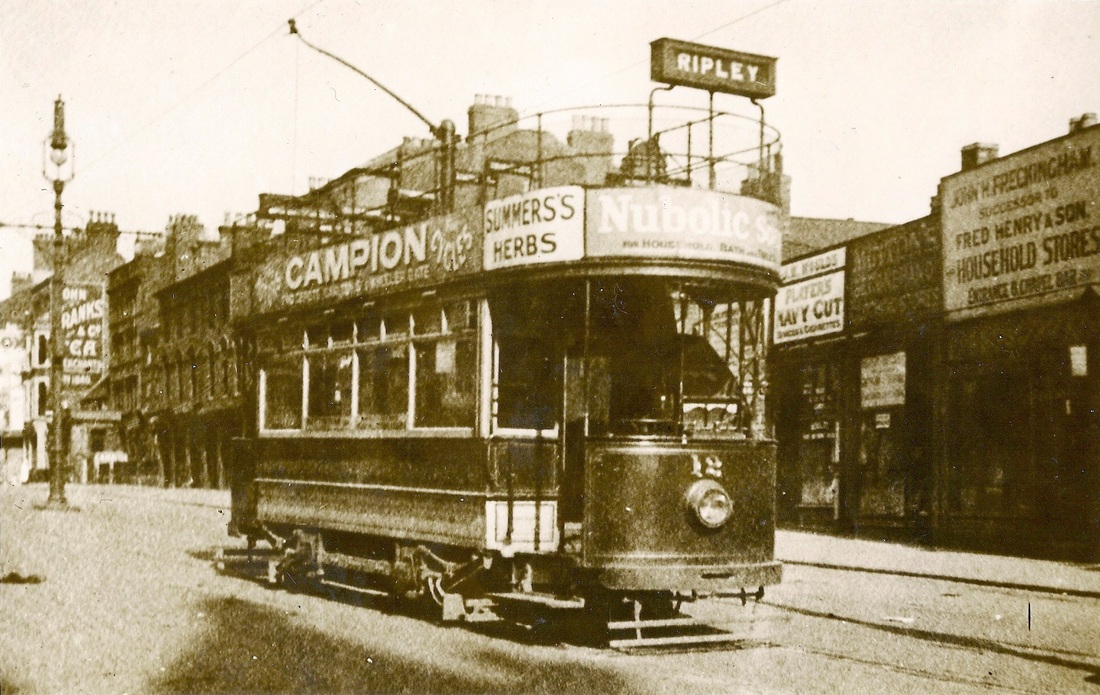
The passengers are disembarking Notts & Derby open top tramcar No. 12 which has just arrived at the Co-operative Square Terminus, Ripley on a chilly damp morning, circa 1930. Note the revamped all-over bright green livery and the new transverse upholstered brown leather seating in the lower saloon can just be seen.
(Open top tramcars no. 9 and no. 11 were similarly updated.)
(Open top tramcars no. 9 and no. 11 were similarly updated.)
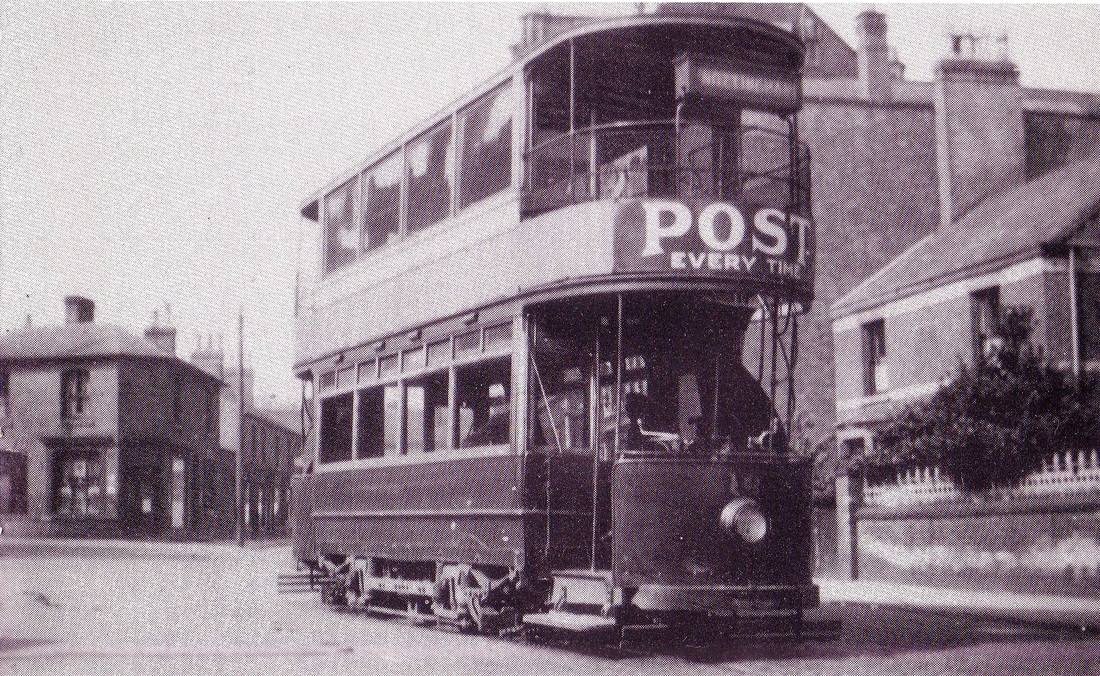
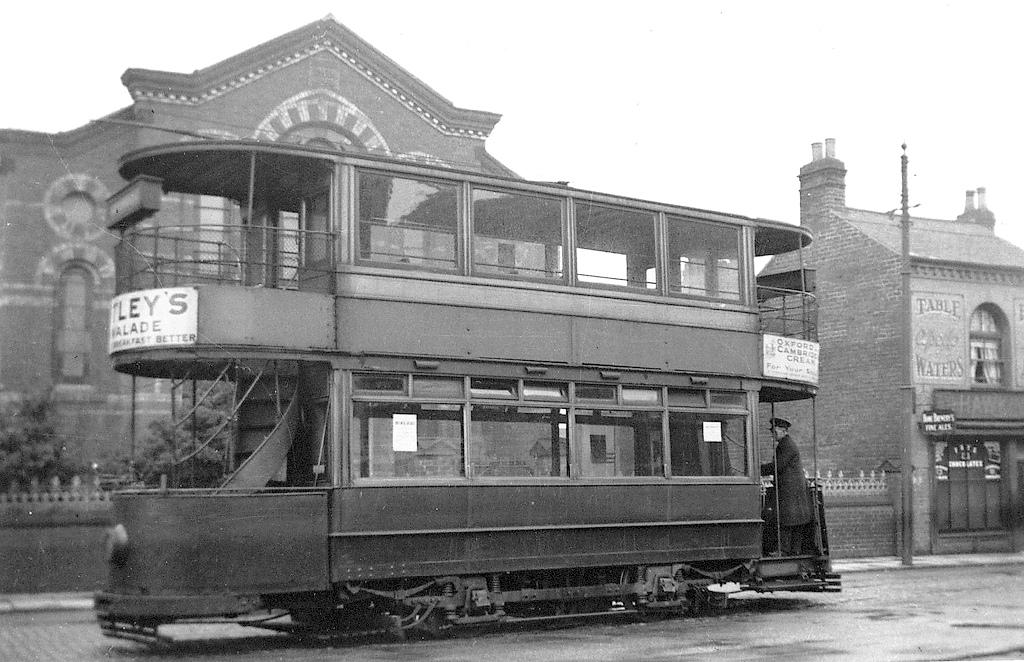
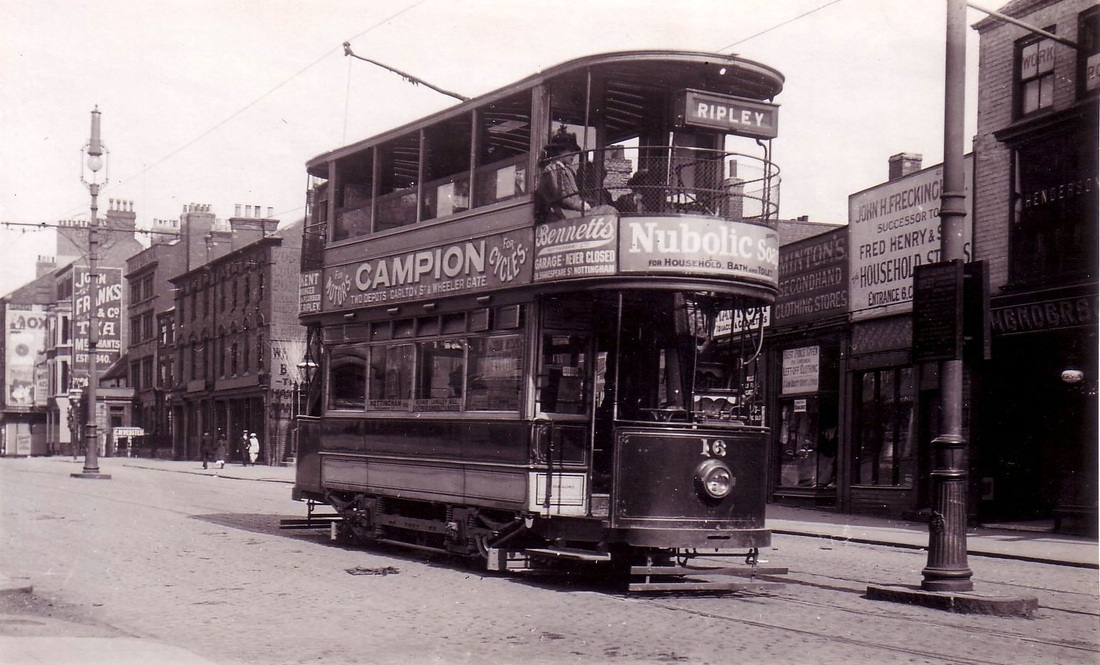
Notts & Derby tramcar No. 16 awaiting departure time at a deserted Co-operative Square Terminus, Ripley. Destination blind reads: Nottingham.
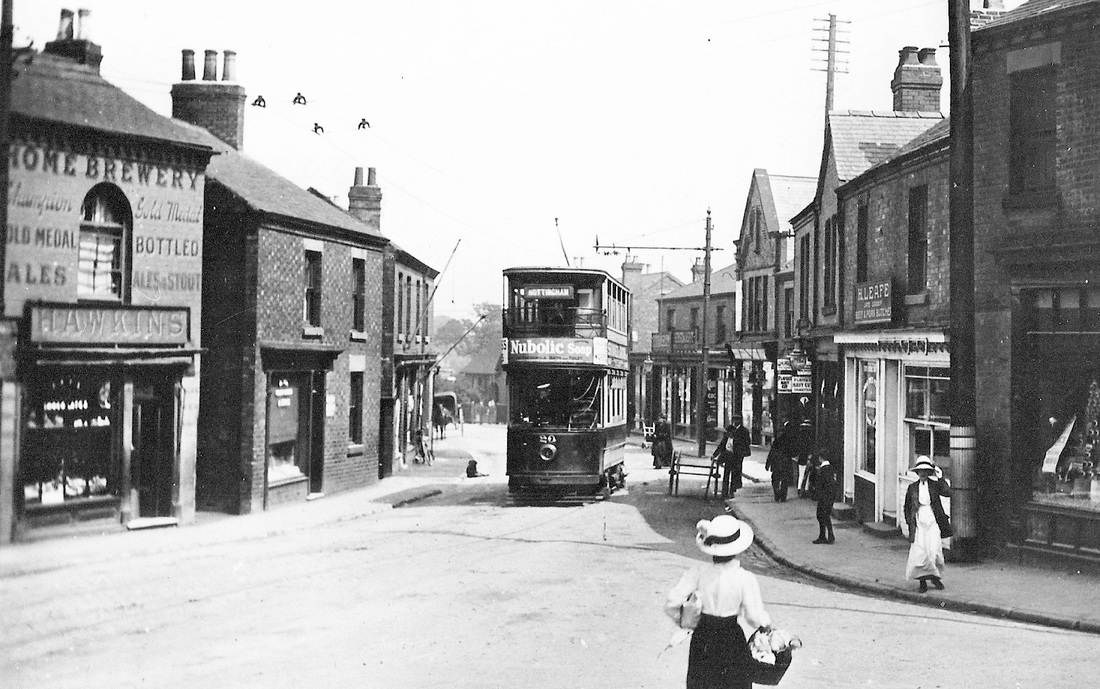
Looking down Nottingham Road, Notts & Derby tramcar No. 20 makes its final approach to the Ripley terminus. The destination display has already been changed to 'Nottingham' for the return journey. Hawkins' shop (left) was demolished in 1979.
Notts & Derby tramcar No. 24 rests on the terminal loop in Co-operative Square, Ripley. Destination: Cinderhill, Nottingham.
The crew appear to be examining a possible problem with the lifeguard (bottom front left of tram).
The crew appear to be examining a possible problem with the lifeguard (bottom front left of tram).
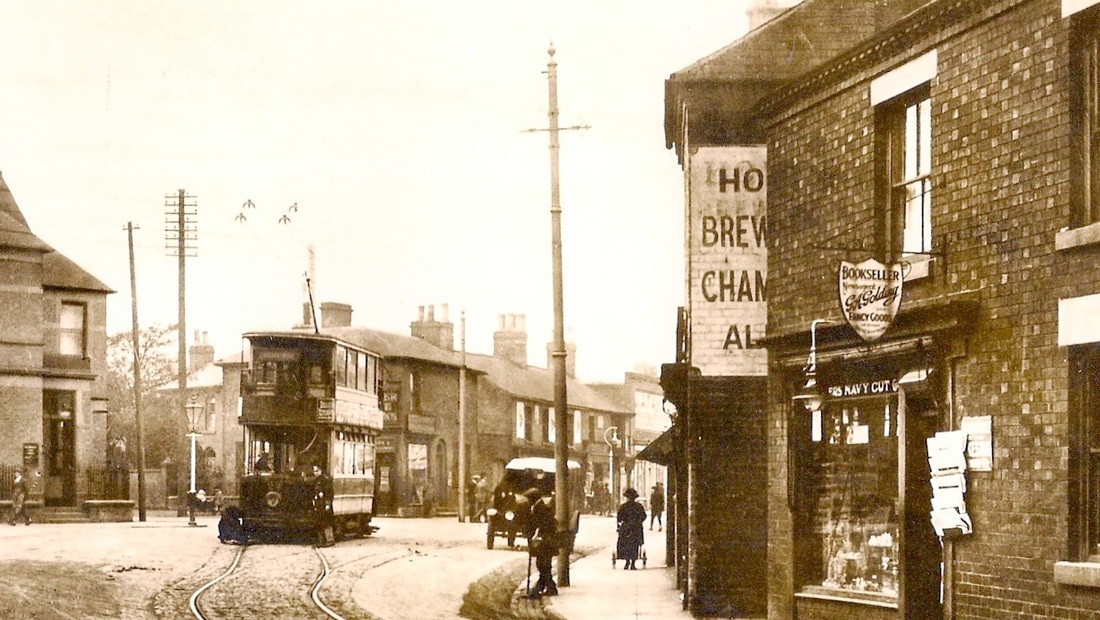
Unidentified Notts & Derby tramcar pictured outside the Ebenezer Methodist Chapel on Nottingham Road, Ripley. The tramcar is in a late revised livery of overall green apart from cream window surrounds and a single narrow band of cream beneath the top deck windows. Circa 1930.
Codnor Gate
Notts & Derby open top tramcar No. 12 waits on the Nottingham Road loop at Codnor Gate as it approaches from Codnor uphill towards Ripley.
Circa 1920s; judging by the attire of the young ladies on the right.
Circa 1920s; judging by the attire of the young ladies on the right.
Codnor
A view of Codnor Market Place in the 1920s as an unidentified Notts & Derby tramcar approaches from Ripley.
The metal stop sign can be seen on the bracket pole above the group of waiting passengers in front of the shops (centre picture).
The metal stop sign can be seen on the bracket pole above the group of waiting passengers in front of the shops (centre picture).
A view looking down from the very top of Heanor Road, circa early 1920s; note the tram lines in the centre of the road.
The houses on the left are Niffins Row; they were demolished in the 1960s and it is now a grassed area separating Nottingham Road and Heanor Road.
The houses on the left are Niffins Row; they were demolished in the 1960s and it is now a grassed area separating Nottingham Road and Heanor Road.

Notts & Derby open top tramcar No. 4 halting at Hardy's Corner, Heanor Road, Codnor in 1916 with motorman Martin and conductress Emla, a Belgian refugee.
Emla had a reputation for quelling troublesome passengers with a blow from her ticket holder ! The entrance to Cross Lane can just be seen on the left.
In the early 1900s no houses existed on the righthand side of the hill below Hollywell Avenue. The only ones being at the bottom of the hill on the corner of Cross Lane (Hob Lane). Here, there was a cluster of houses and a shop, which were known as Hardy’s Corner. These were demolished in the late 1960s.
Loscoe Road, Heanor
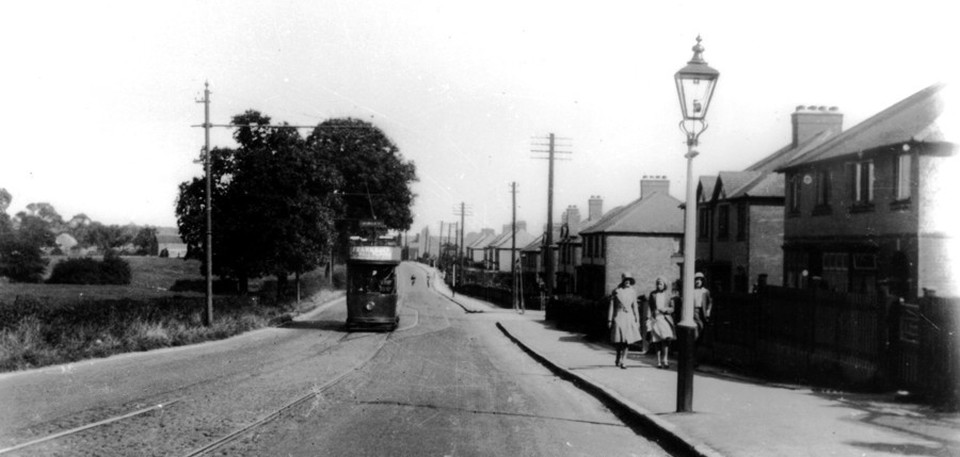
1913. A gleaming new Notts & Derby tramcar No. 14 on the Loscoe Road loop with Allandale Road, opposite Loscoe Road Post Office. The destination displayed is Nottingham but the tram was only on a proving run prior to the opening of the service. At that time, the tram would only have been able to reach as far as Cinderhill.
Heanor
An early photograh of Notts & Derby open top tramcar No. 1 climbing High Street on the approach to Red Lion Square in Heanor, on a summer day in 1913. Destination reads: Nottingham
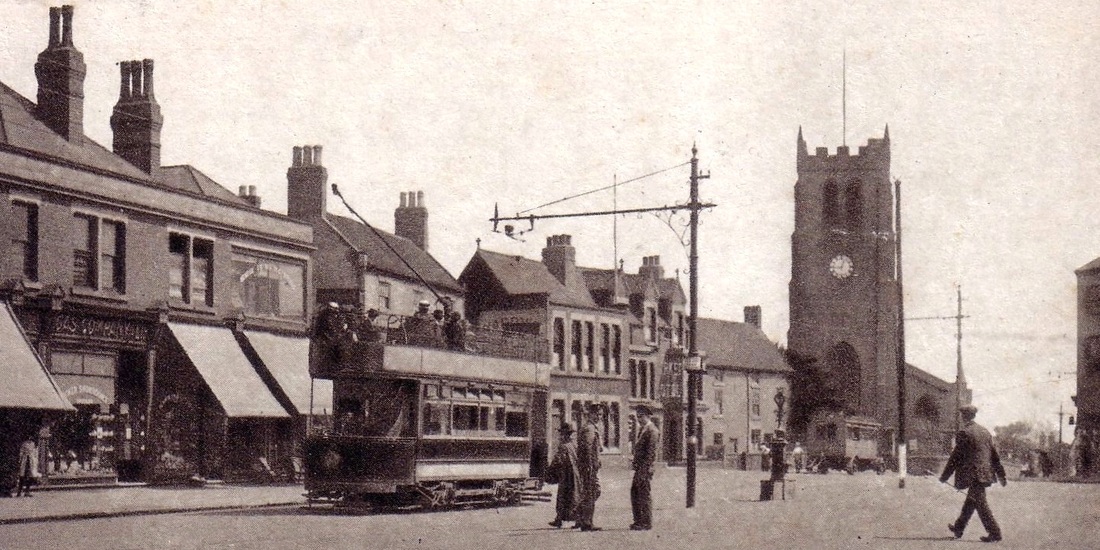
An unidentified Notts & Derby open top tramcar pauses at Heanor Market Place on its long journey to Nottingham.
St Lawrence's Church tower dominates the skyline. An early omnibus can been seen just in front of the church - probably running just in front of the tram and trying to steal the tram's clientele !
St Lawrence's Church tower dominates the skyline. An early omnibus can been seen just in front of the church - probably running just in front of the tram and trying to steal the tram's clientele !
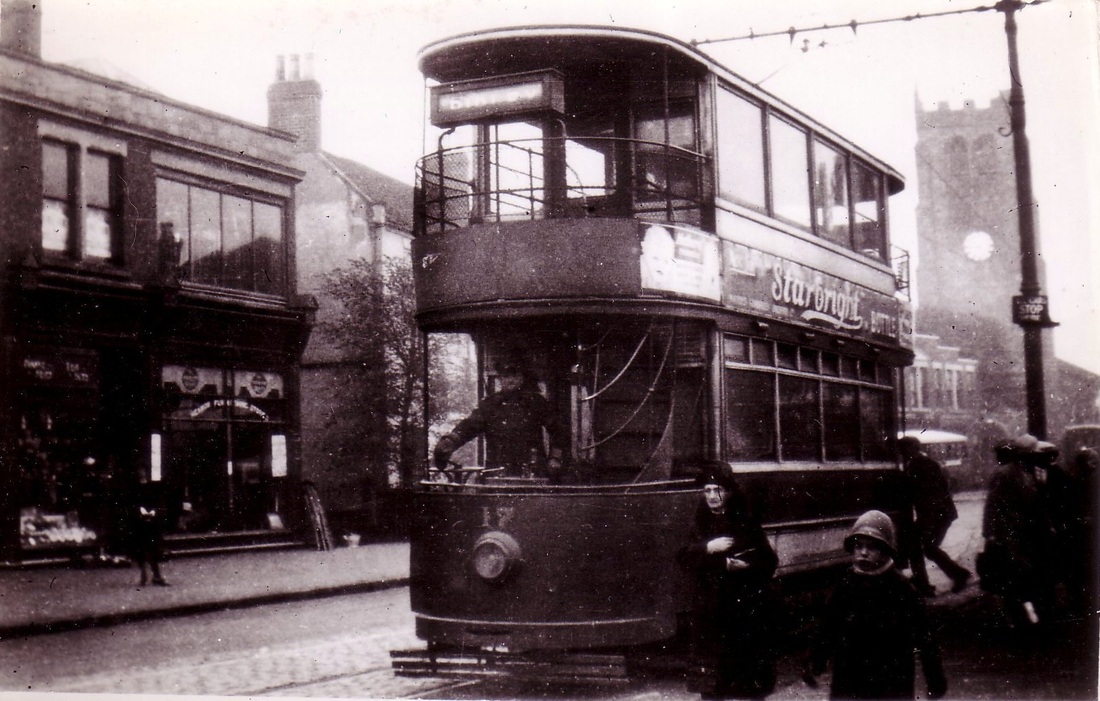
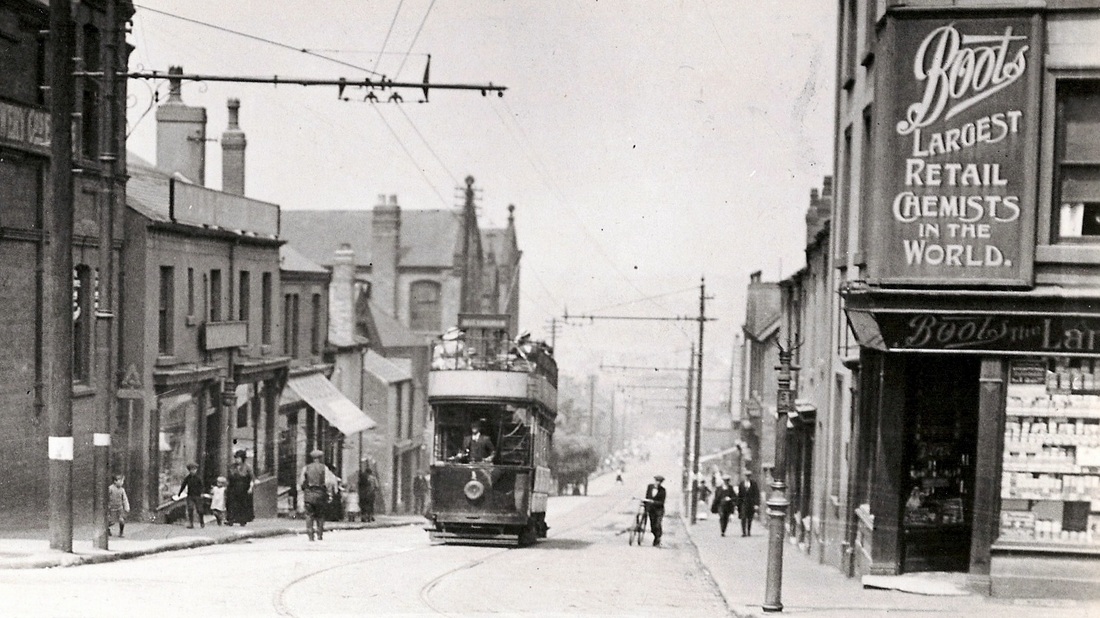
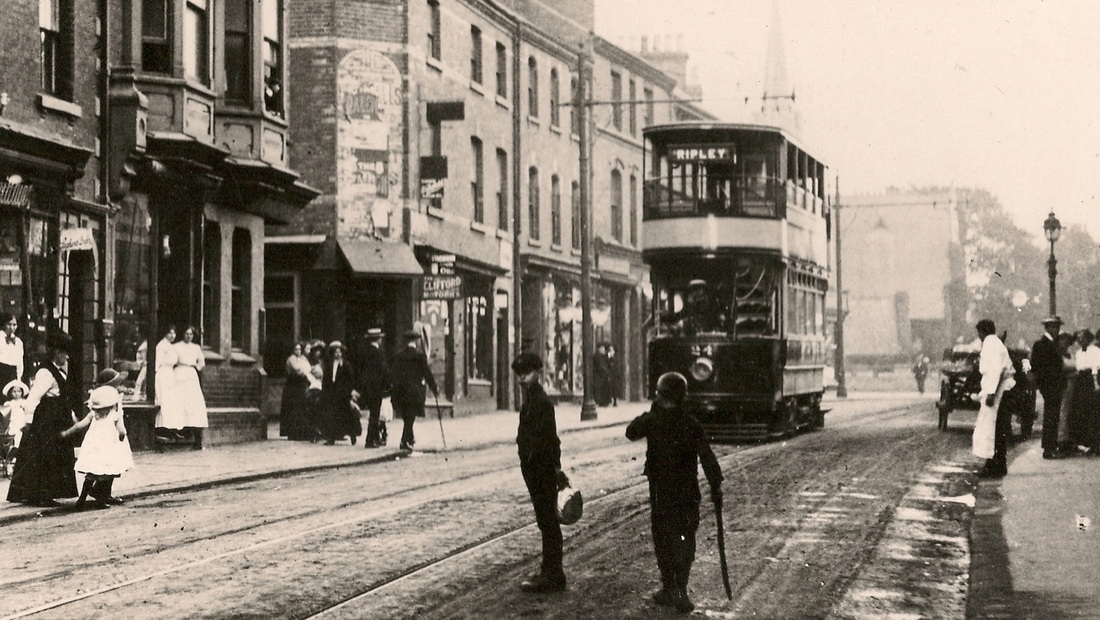
Notts & Derby covered top tramcar No. 17 at Heanor Market Place on the Nottingham to Ripley service, probably after World War I. The destination blind reads: Ripley. The traction pole (right) holds a metal 'ALL CARS STOP HERE' sign. St Lawrence's Church tower can be seen looming in the background.
Notts & Derby covered top tramcar No. 21 descends Market Street, Heanor at the junction with Derby Road during World War I.
The destination blind reads 'Nottingham' but the tramcar is actually travelling towards Ripley !
The destination blind reads 'Nottingham' but the tramcar is actually travelling towards Ripley !
Langley Mill
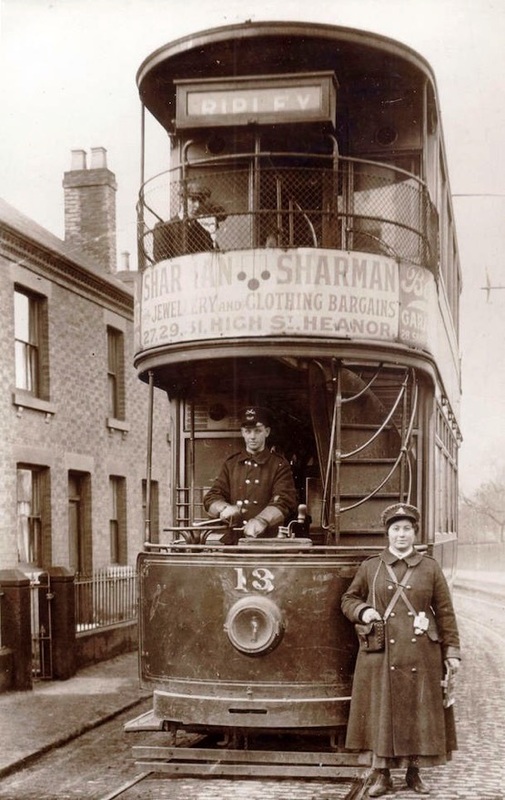
A rather tatty-looking Notts & Derby tramcar no. 13 pictured in Station Road, Langley Mill - undated, but certainly taken during the Great War.
The tram is Nottingham bound although the conductress has neglected to turn the destination blind which still reads Ripley!
The tram is Nottingham bound although the conductress has neglected to turn the destination blind which still reads Ripley!
An unidentified Notts & Derby open top tramcar has suffered a derailment outside Langley Mill Wesleyan Chapel, post World War I.
The usual crowd of spectators stand helpfully and watch whilst another leans against the tram front seemingly determined to hide the fleet number!.
North Street is just behind the bull-nosed Morris to the right of the tram.
The usual crowd of spectators stand helpfully and watch whilst another leans against the tram front seemingly determined to hide the fleet number!.
North Street is just behind the bull-nosed Morris to the right of the tram.
Langley Mill Garage
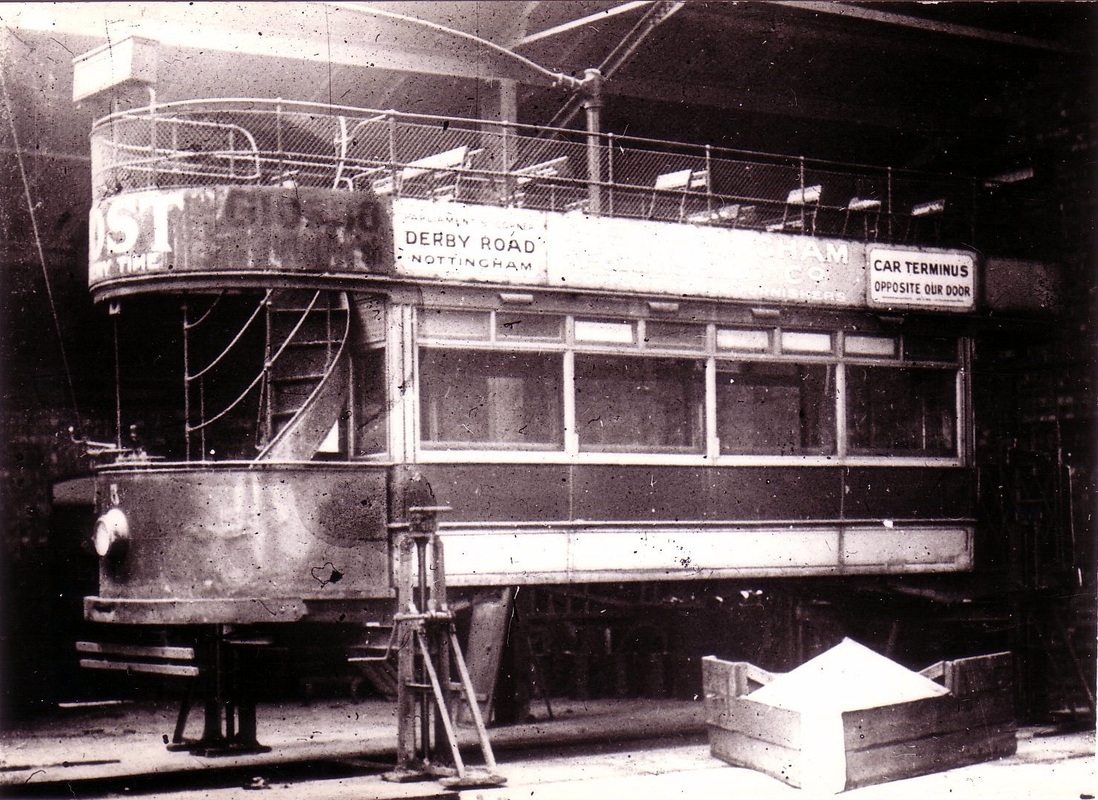
Notts & Derby tramcar No. 8 in very poor condition. The photograph taken inside Langley Mill Garage, circa 1926, shows the body jacked up in preparation for a complete overhaul. It would have been at that time that the seating was re-arranged.
Eastwood
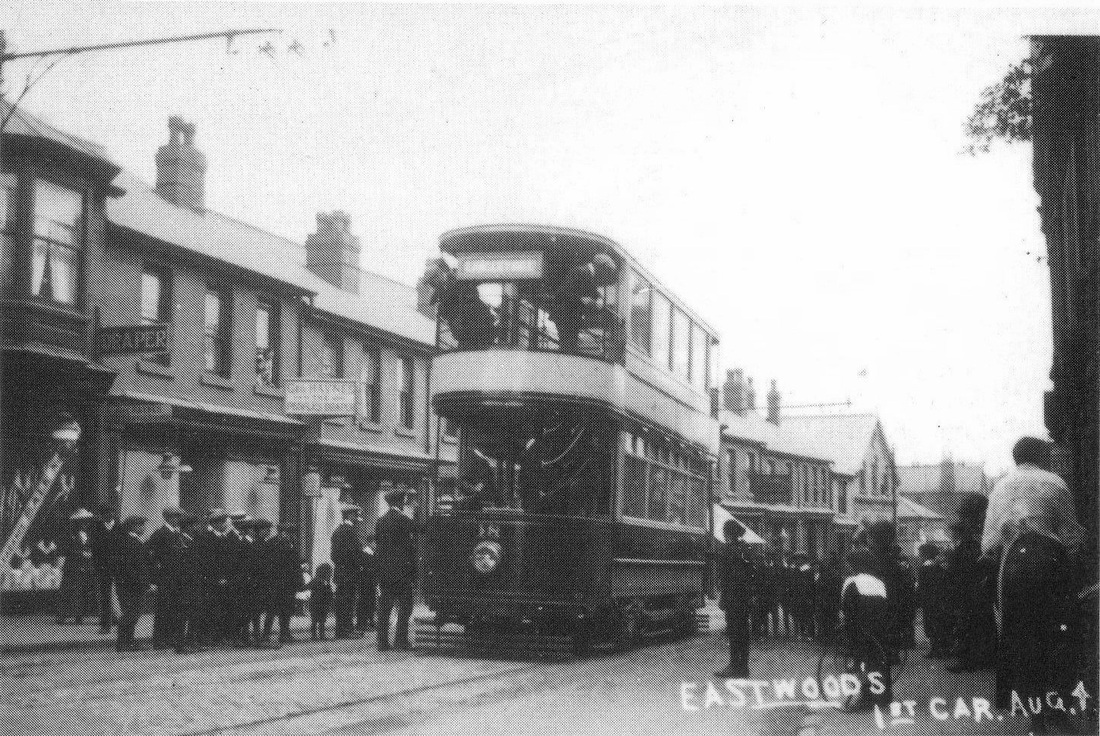
4th August 1913, Eastwood's first tramcar. Destination displayed is: Langley Mill.
Notts & Derby covered top tramcar No. 18 stands outside Geo. Haynes - The People's Draper - shop ready to set off for the short journey to Langley Mill.
Notts & Derby covered top tramcar No. 18 stands outside Geo. Haynes - The People's Draper - shop ready to set off for the short journey to Langley Mill.
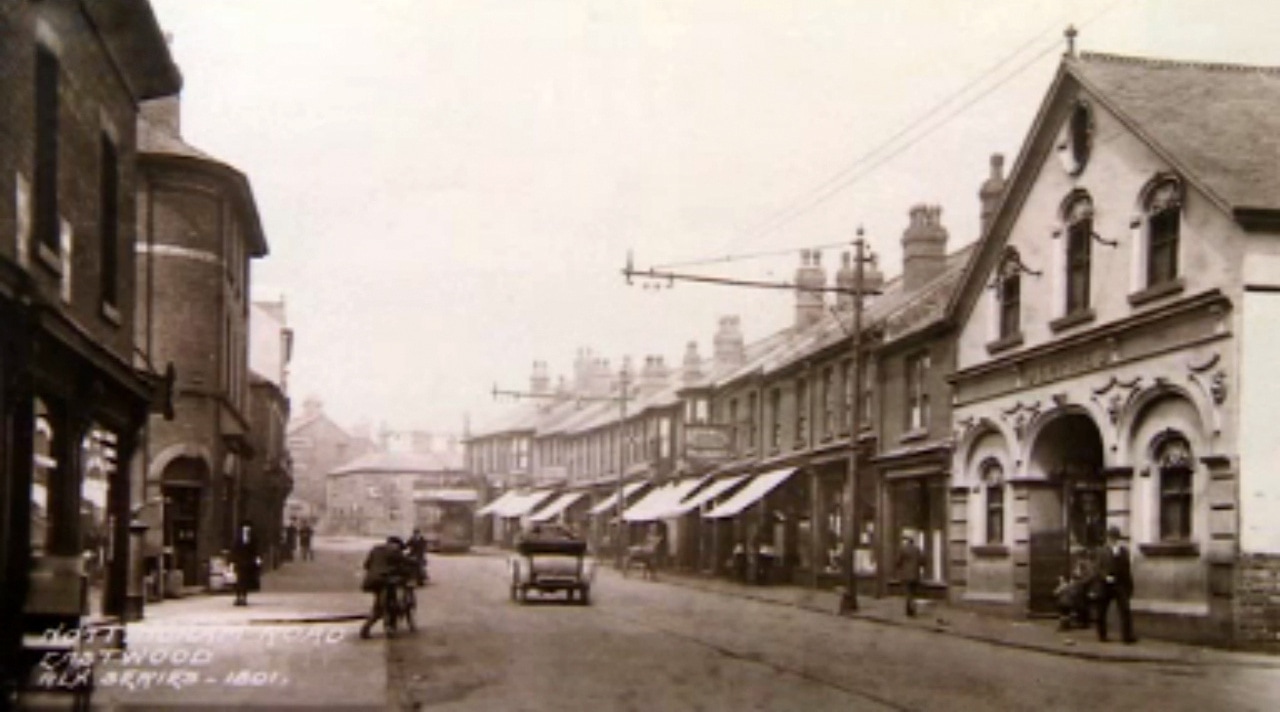
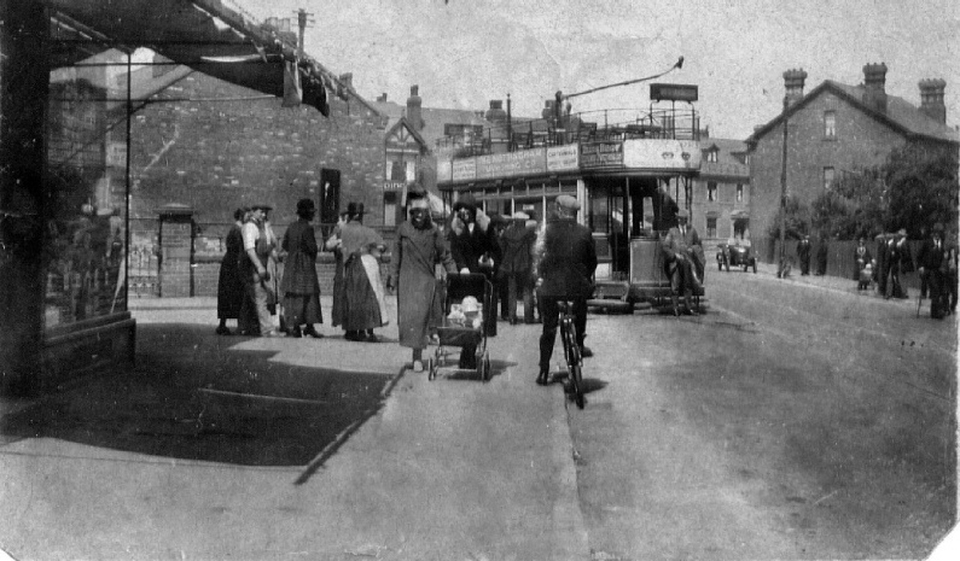
Looking up Nottingham Road, Eastwood in the opposite direction, an unidentified Notts & Derby open top tramcar is approaching the main shopping area.
A very new looking Notts & Derby tramcar No. 24 on Nottingham Road, Eastwood. Destination displayed is: Ripley.
Judging by the clothing of the shoppers in this fairly busy street scene, the date is probably 1913 or 1914.
Judging by the clothing of the shoppers in this fairly busy street scene, the date is probably 1913 or 1914.
Kimberley
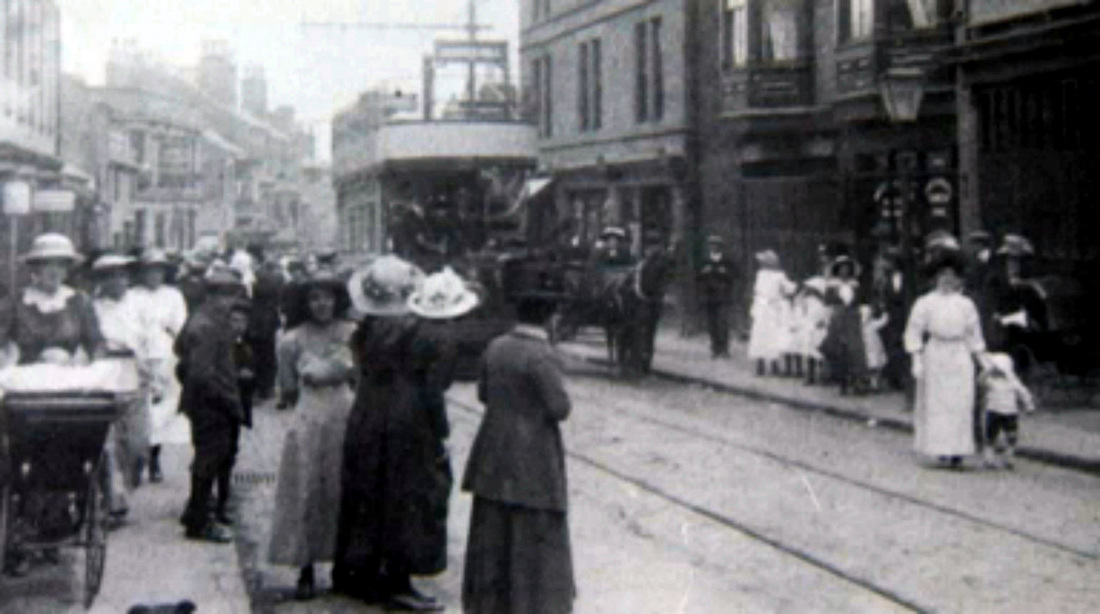
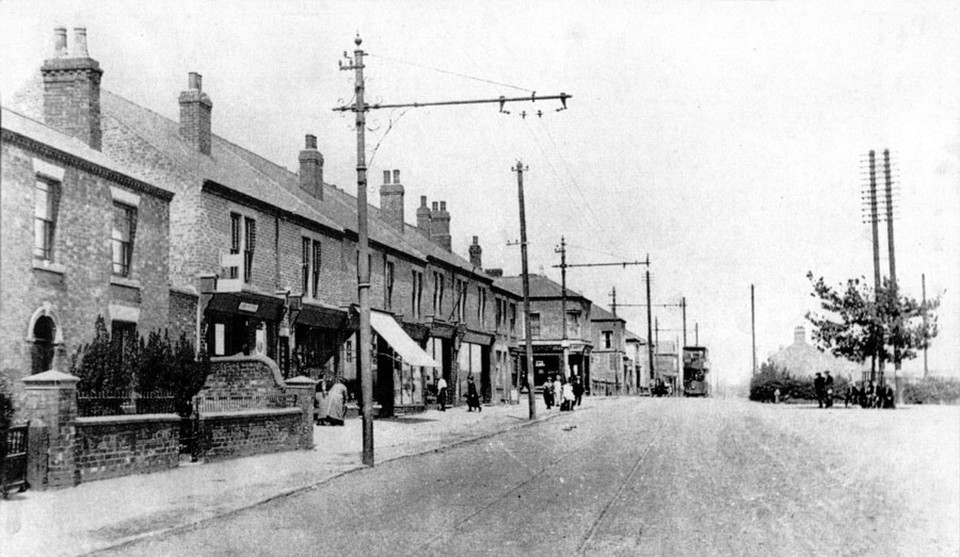
An unidentified Notts & Derby open top tramcar negotiates a very busy Main Street, Kimberley.
The sign for the Queen's Head Inn can just be made out on the buildings to the left of the tram's upper deck.
The sign for the Queen's Head Inn can just be made out on the buildings to the left of the tram's upper deck.
Nottingham
Notts & Derby open top tramcar No. 12 at the Upper Parliament Street Terminus in Nottingham. Destination blind reads: Ripley
Notts & Derby tramcar No. 16 waiting to leave the Upper Parliament Street Terminus, Nottingham in 1916. Destination: Ripley
Ilkeston
On the 15th November 1916, the the Nottinghamshire & Derbyshire Tramways Company also took over Ilkeston Corporation Tramways, which had a total fleet of 13 cars at that time, but only 8 were retained. The business was sold for £28,150 plus stock at cost price. Just prior to the sale, the Chairman of the Finance Committee had stated that the track was in a shocking state and all the
trams were cripples, with four off the road!
The Ilkeston Corporation tramcars were repainted and now shared a livery of light green (later dark green) and cream with a gold lining with Notts & Derby.
The routes of the two companies never joined but with a reduced fleet of just eight tramcars, the system ran for another 15 years. By the start of 1931, the Ilkeston tramway had ceased operation and was replaced by Notts & Derby trolleybuses.
Former Ilkeston Corporation tramcar No.8, now in Notts & Derby livery, waits at the Ilkeston Market Place stop in 1928.

An unidentified former Ilkeston Corporation tramcar, now in Notts & Derby livery, descends Bath Street, Ilkeston on its way to Cotmanhay, post-World War I.
